How i taught my son to type - Explained Step by Step

My son had great difficulty with tripod grip and he was not
able to write after his Early Intervention programs.so when he was 8 years old
I decided to teach him typing and I taught him step by step. After that I
started sharing that videos to help other kids.Lots of parents contacted me for
the step by step procedure of typing and so again I am posting it for them. All
these steps I did and it helped my son to learn.I hope it will help other kids
too. Most important things is CONSISTENCY. We should do step by step
consistently.
Prerequisites of typing
Step 1:
Pointing to alphabets in an alphabet chart with visual
clues.
Step 2:
Find which is different from a strip of alphabets and sorting
confusing alphabets like n and u,p and b,b and d.
Most of our kids have confusion with alphabets like p and
b,u and n….because of their visual discrimination difficulties.
After achieving these two steps independently,we can
introduce keyboard to the child.
Step 3:
I was using small letters with him because that is going
to help them for reading.So I pasted 7 lower case letters on the laptop and
created a worksheet with pictures of cat,ant and owl.He was able to identify
that pictures and words at that time.Thats why I moved to word typing.I took
printouts of the words in big font and put a space between letters to help
him.you can see that clearly in this video.
Step 4:
When he moved
into independent typing for that worksheet I introduced more words.Always I was
making independent worksheets in webpage because my long term goal is data
entry and Communication by typing. For that he should be independent.
Step 5:
In the next level
I choose 7 more words that associated with his daily life and at that stage
when I was taking print outs, I reduced the font size and there was no space
between letters.
Step 6:
Then I introduced ‘Clevy keyboard ‘ for him and was
practicing all the above worksheets.In Clevy keyboards are coming with lower
case letters and no need of sticking because keys are big and colourful.
Step 7:
Then he was able
to type words independently for the corresponding pictures using Clevy
keyboard.
Step 8:
Then I started teaching to type simple sentences for his
favorite pictures. For that I created worksheets with pictures and then took
print outs of sentence strips. In Clevy keyboard space bar is green coloured
and so for space I gave green colour visual clue.You can see that in this video
Step 9:
At that time I noticed that,che learned spellings and so I
made two worksheets for ‘at’ words and ‘an’ words. And practised like this
Step 10:
Then I created a worksheet for typing numbers from 1 to
10.I thought for teaching him to make bills ,I should introduce this step.
Step 11:
Also I introduced more words to type like verbs ,all that
words are important in their daily life.
Step 12:
Then I realized
that he is able to learn spellings by phonics, So I created some worksheets for
practicing that.
Step 13:
After that I
tried typing alphabets in Avaz keyboard with visual clue. I was surprised to see
that he was able to type alphabets independently. This video is how he was
typing when I introduced.
Step 14:
After that I tried,typing alphabets in Avaz keyboard
without visual clues. Again I was surprised to see that he is doing that
independently.
Then I introduced typing
words in Avaz keyboard
Step 16:
Simultaneously I was working with Clevy keyboard and at
that time he became independent in typing simple sentences.
Step 17:
After that I
introduced typing that simple sentences in Avaz keyboard also.
Step 18:
Then I moved to teaching typing two sentences
together, by introducing full stop.
Step 19:
Then I introduced more worksheets for typing body parts
and names of fruits.
Step 20:
When I realized that, he should learn about how to build
sentences to type meaningfully,I started teaching him the construction of
sentences. After that I created more worksheets with pictures and teaching him
like this.
Step 21:
It is very important to work for their independent
skills to enhance their focus and work skills.So I am training him like this
for improving his work skills.
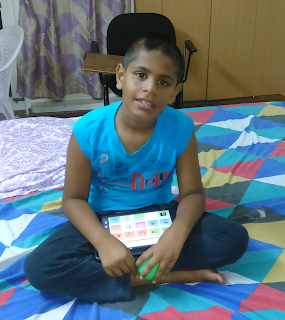
These are the different steps of typing activities. Now he is able to type in all keyboard including laptop. I hope it
will help other parents and kids.
Regards
Smrithy and Addu.


Thank you so much for your guidance.
ReplyDelete